I have come across many blogs which use Entra ID IDP for Workspace ONE UEM SAML Integration but the same one also showcase how we can create those users JIT. It’s a fairly complex bit of work but my customer’s need was not that. They just simply wanted to set Azure as IDP while they kept their identity source as LDAP.
After some permutations and combination, it was evident that I was overthinking it and we just need 3 attributes to be mapped in the SAML response, UPN, sAMAccountName and ObjectGUID. That is all UEM needs to securely authenticate the user and hence here are the steps to get this started.
While working with this customer I had a chicken and egg situation which I did not realize would happen. UEM SAML wants the IDP metadata first and only then it will generate the SP metadata with the right Entity ID updated. On the other hand, Azure wants the SP metadata first and only then it will complete the app identifier settings and allow you to download the app specific metadata. Hence we will have to do some double uploads just to circumvent this issue. So here are the steps.
- Log into the UEM console under Groups and Settings > All Settings > System > Enterprise Integration > Directory Services
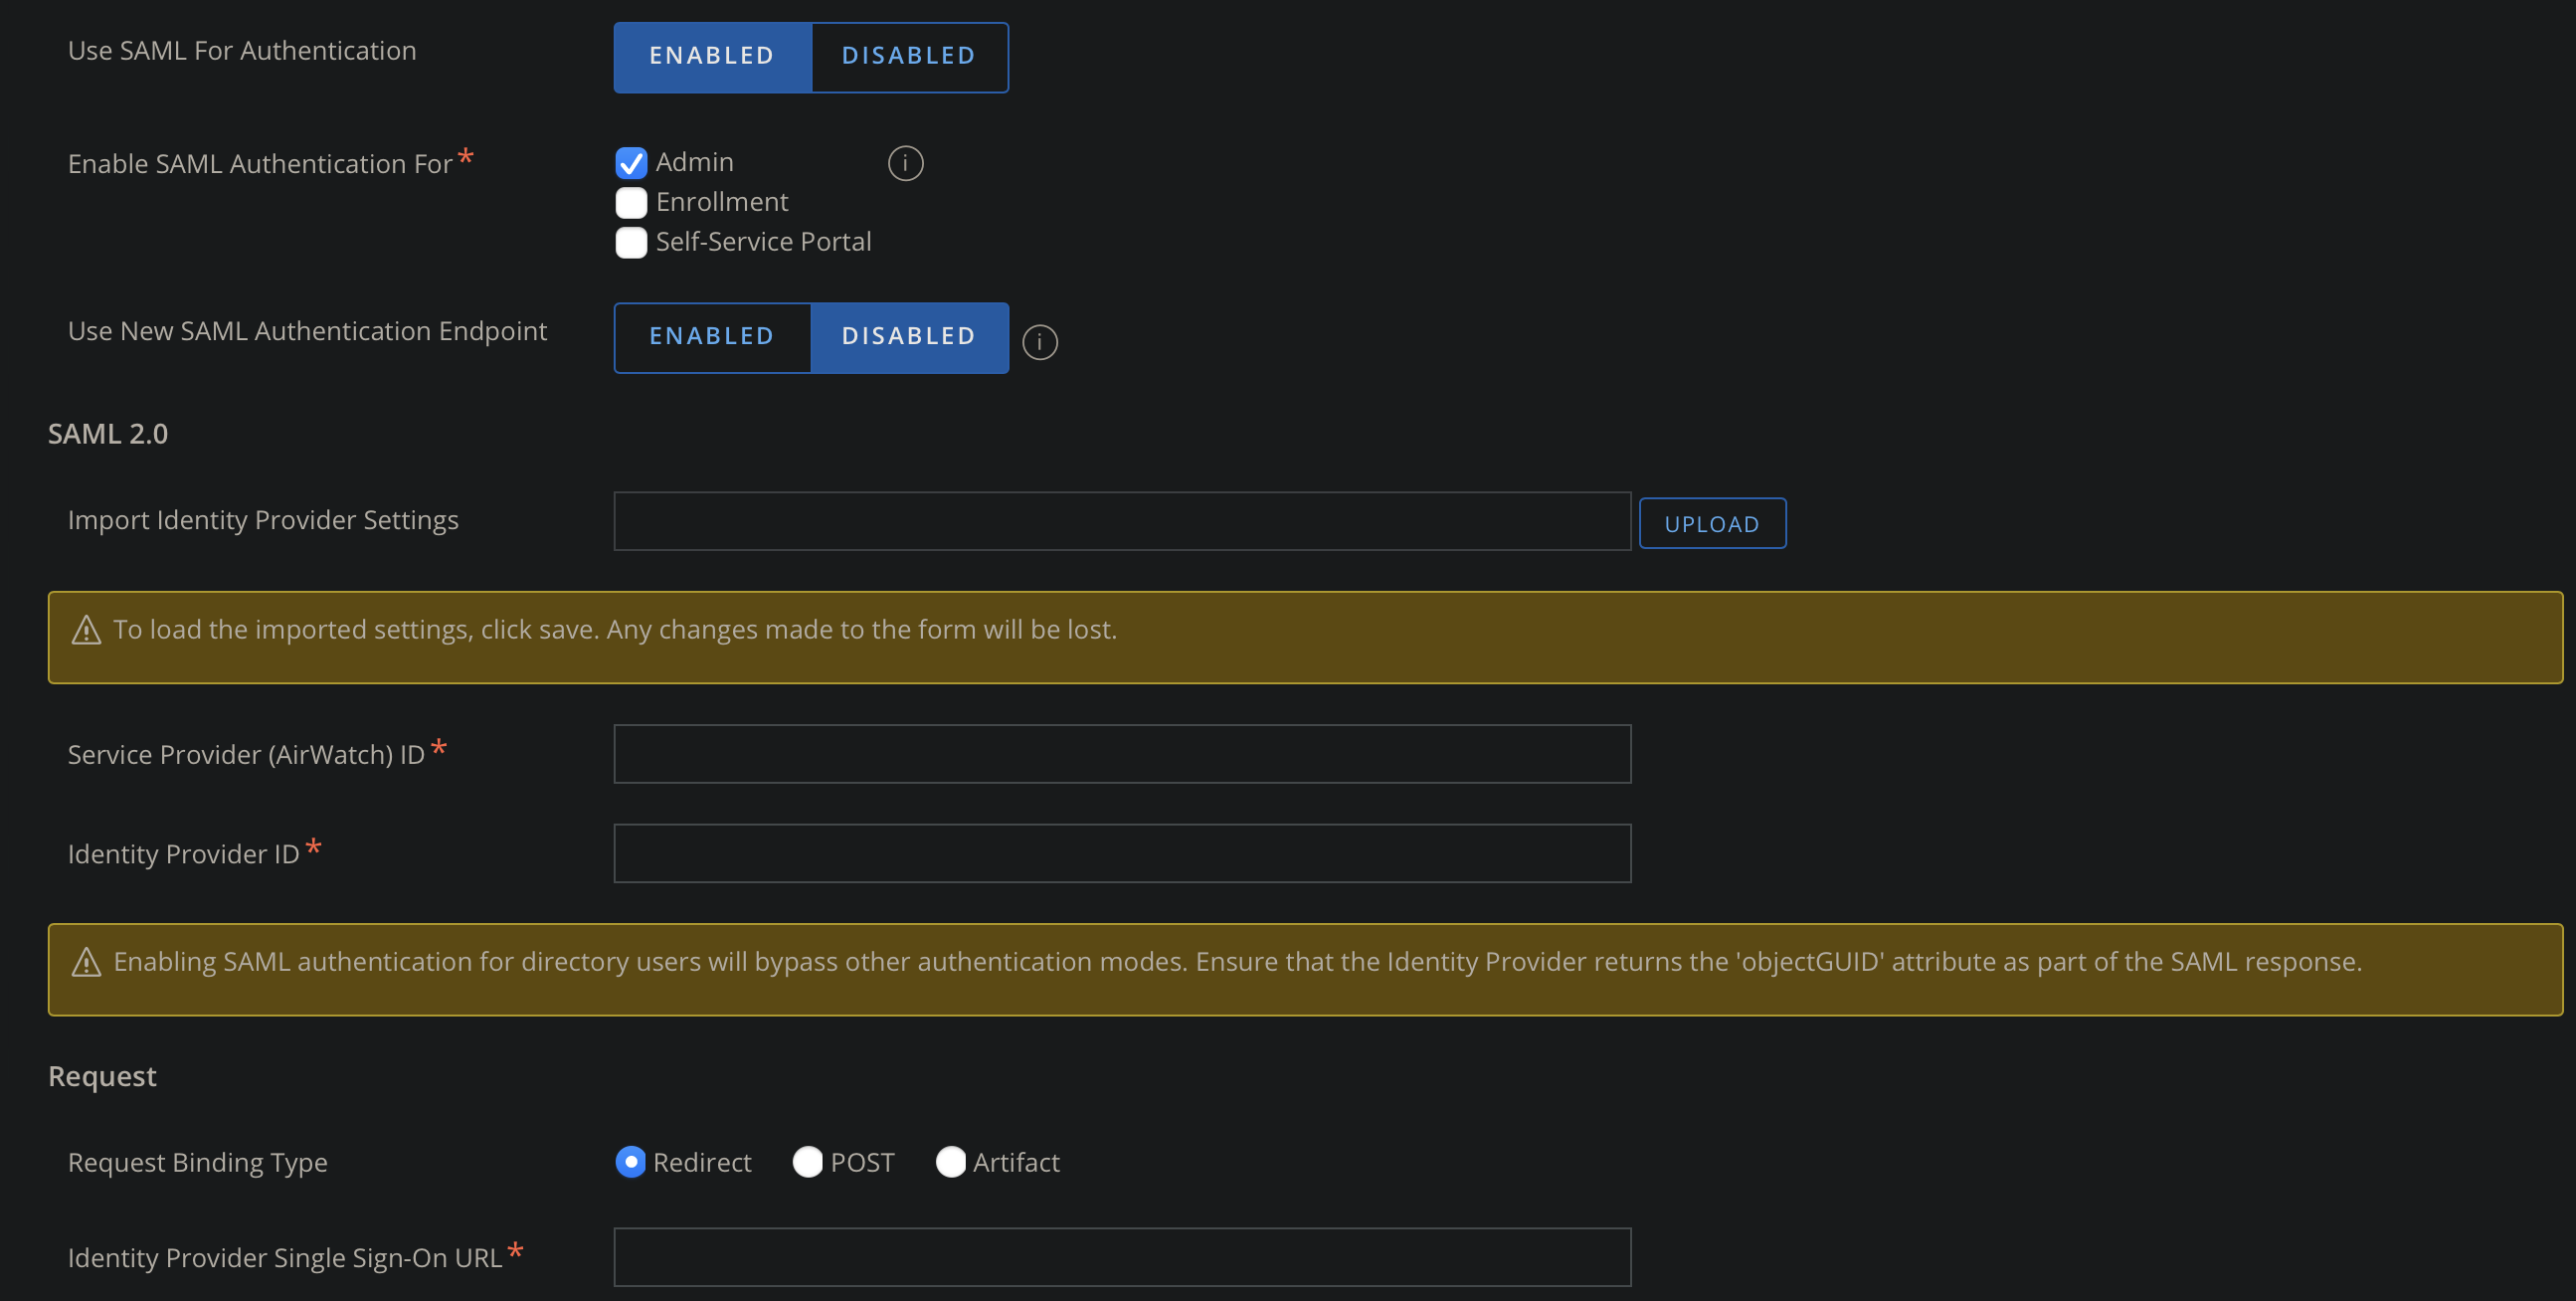
- On the Server Page set Use SAML For Authentication as ENABLED
- Scroll to the bottom and grab Export Service Provider Settings

- Open XML file AirWatchSamlSettings.xml

- You will notice that the entityID field is empty which is needed for this to work. By default it’s
AirWatchbut you can set it to anything of your choice. In my case I will set it toamcloud-azuread-cn.
- Navigate to portal.azure.com > Entra ID > Enterprise Application > + New application
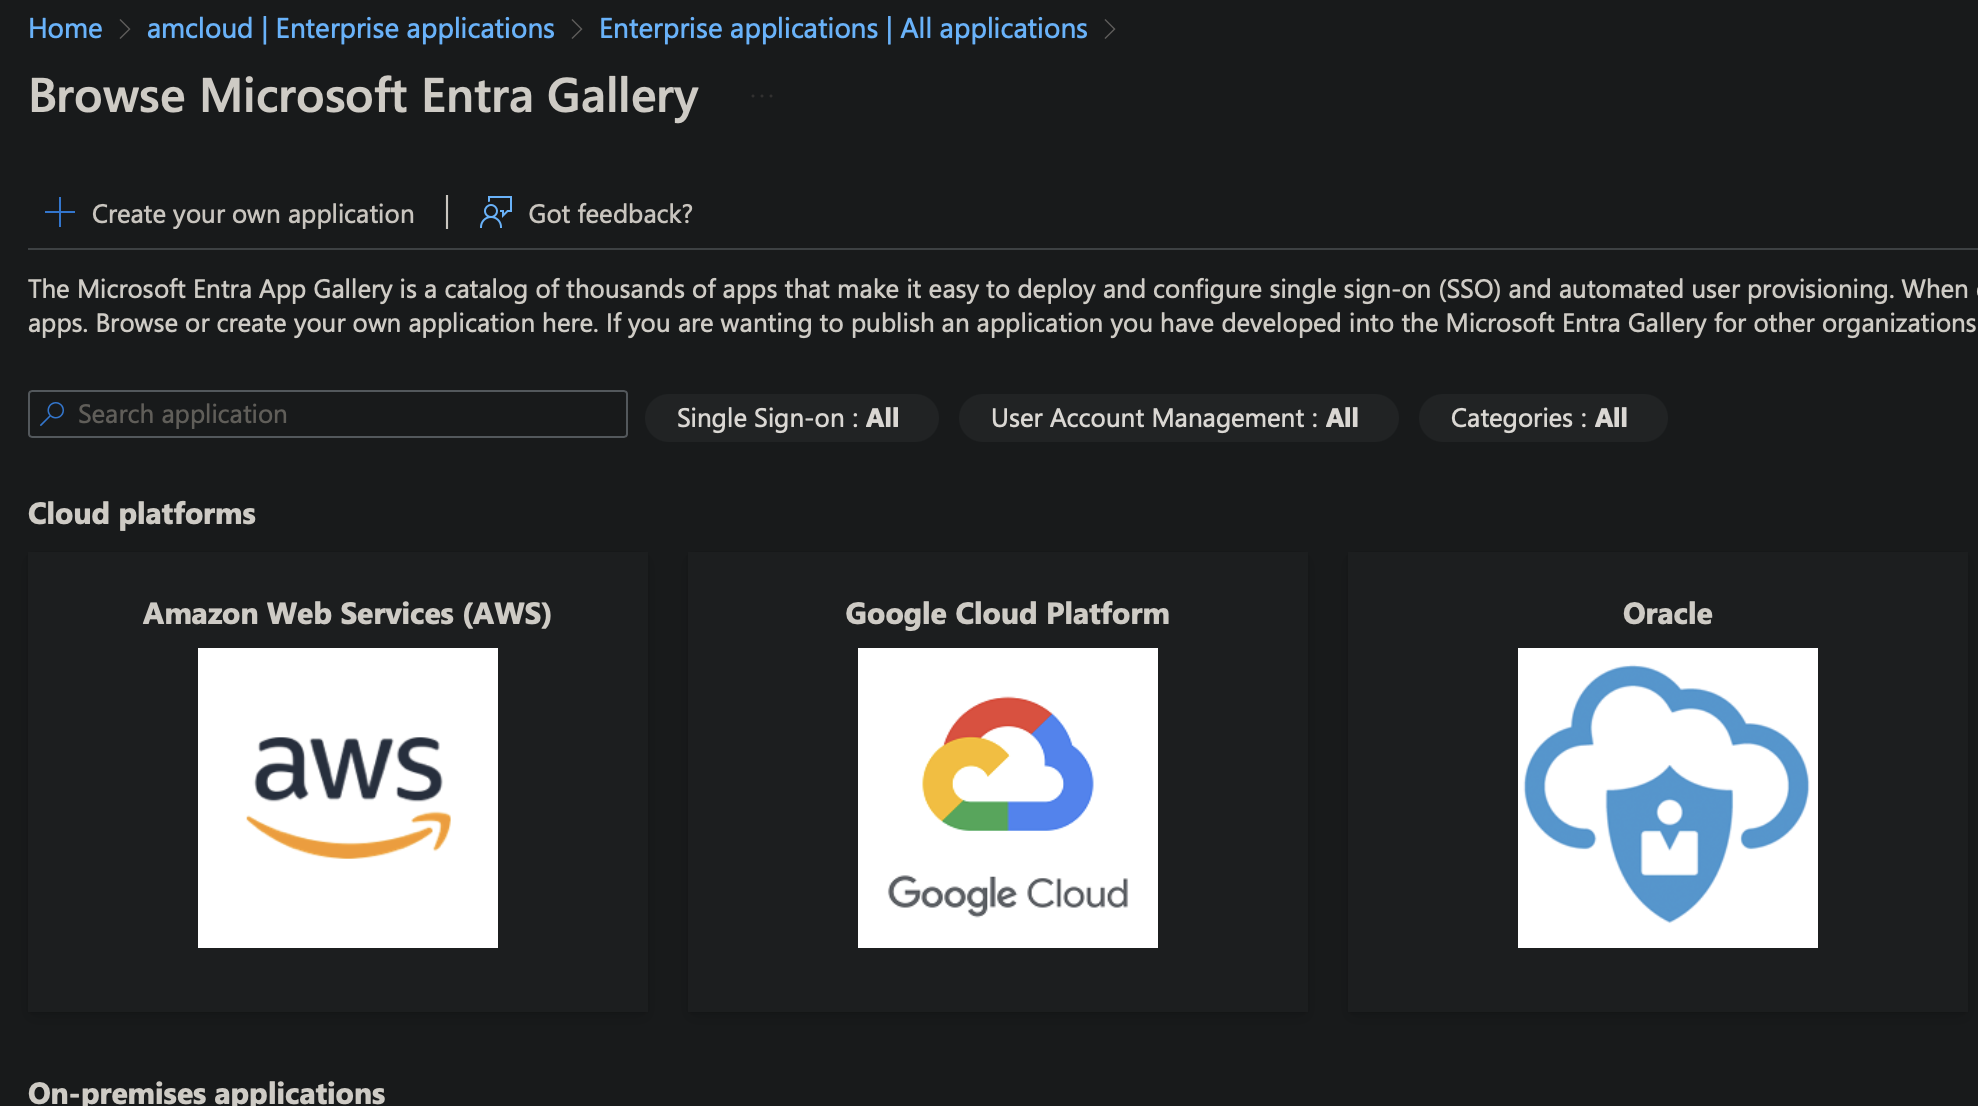
- Click
- Create your own application,
- Give it a name –
tenant-UEM-SAML - Choose Integrate any other application you don’t find in the gallery (Non-gallery)
- Click Create
- Pick – Assign users and groups to assign a test user of group for this round.

- Next pick Set up single sign on
- Pick SAML

- Choose upload metadata file and upload the edited AirWatchSamlSettings.xml file here.

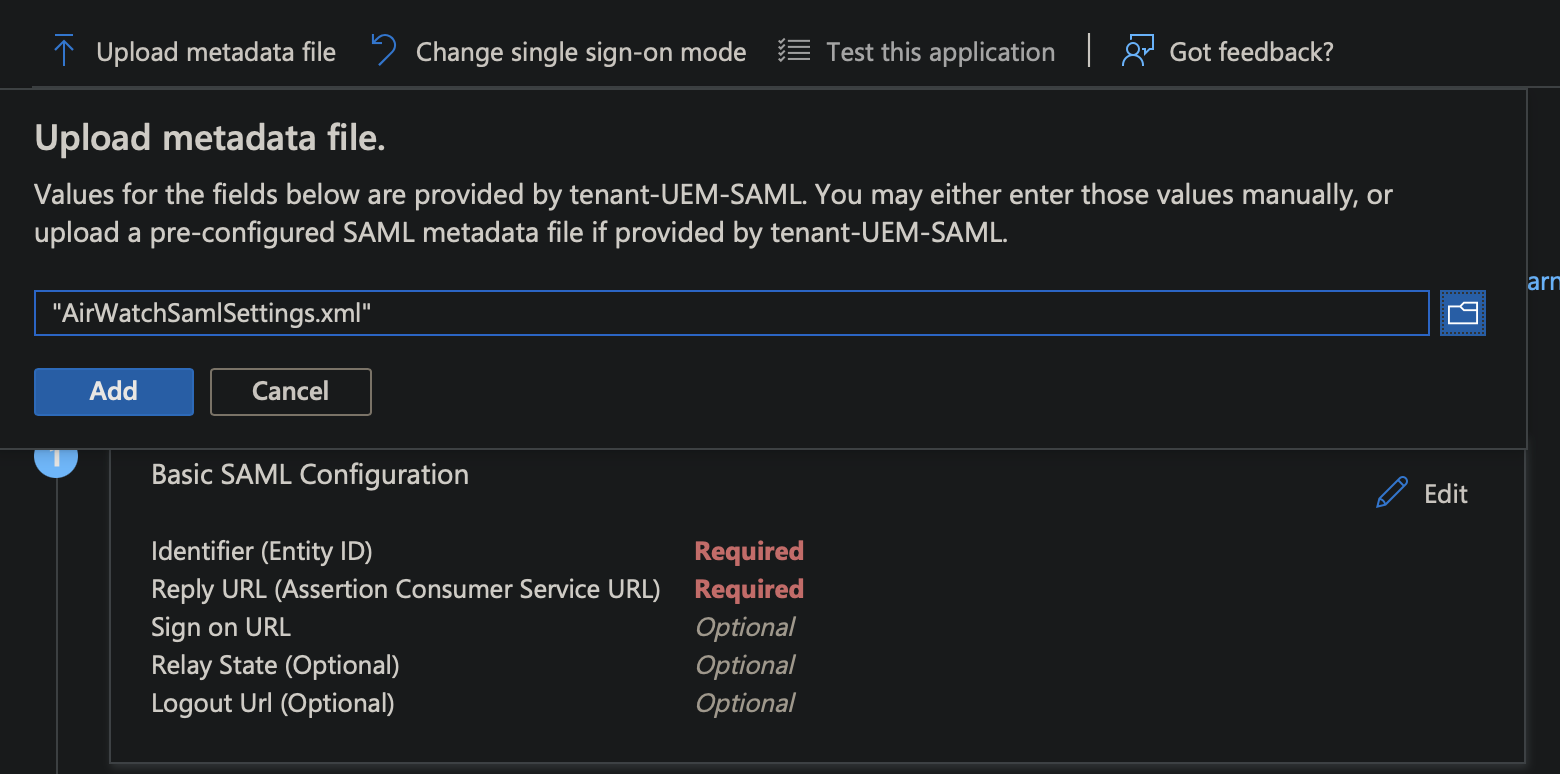
- Save the configuration

- Now scroll down to SAML certificates and download the Federation Metadata XML. You should get a file called <application-name>.xml

- Navigate back to the UEM console and upload this file into the UEM console.

- Once uploaded you will have to save this page for the XML to be parsed.

- You will notice Service Provider (AirWatch) ID has changed to default of
AirWatch. Switch this back to whatever it says in your Azure app. In my case itsamcloud-azuread-cn. - Switch the Request and Response type to POST.

- Save the page again at the bottom of the page.
- Again download the AirWatchSamlSettings.xml under Export Service Provider Settings.
- Reupload the meta data file within Azure and Save


- Edit Attributes & Claims
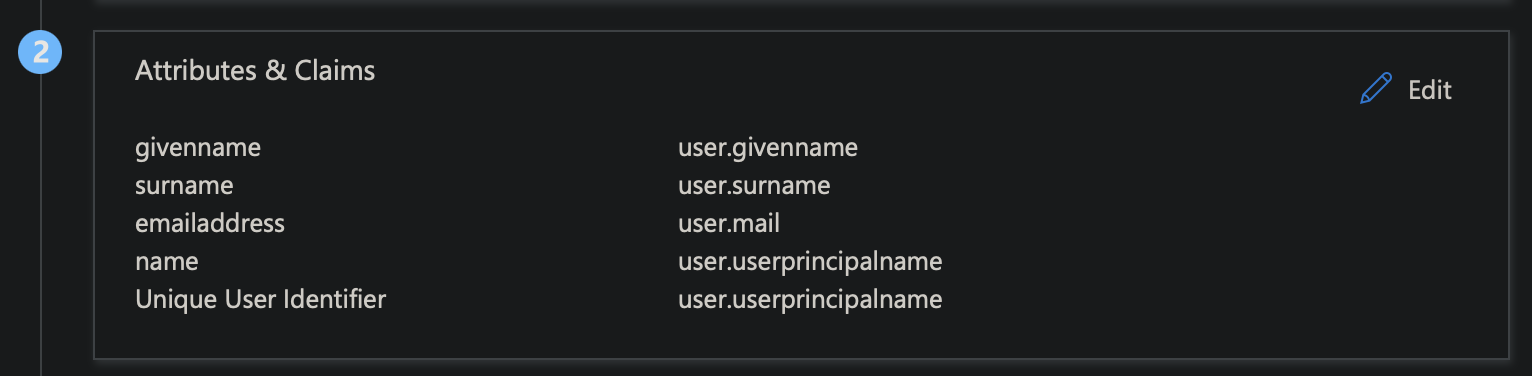
- Change remove all existing claims and map the following. All are selected from drop down and you don’t need to enter them manually. Please note if you do not see them in the list, that means Azure AD Sync is not pulling these values.

- Name ID – user.userprinicpalname
- objectGUID – user.objectguid
- sAMAccountName – user.onpremisessamaccountname
That is all folks! the TL;DR; for this entire integration to work, UEM just needs the above three claims. Without the sAMAccountName and objectGUID we will have a failure as just UPN is not enough for us to make the claim work. For any reason you cannot sync the objectGUID, you can alway use the integration between UEM and Access and then from Access to Azure. Access to Azure integration is more forgiving and can use existing claims rather than having to use only the specific ones in question.

Leave a comment